
If you’re using a taxonomy for venues, you can go a step further by replacing the existing Location details section in your events settings with the custom taxonomy you set up.
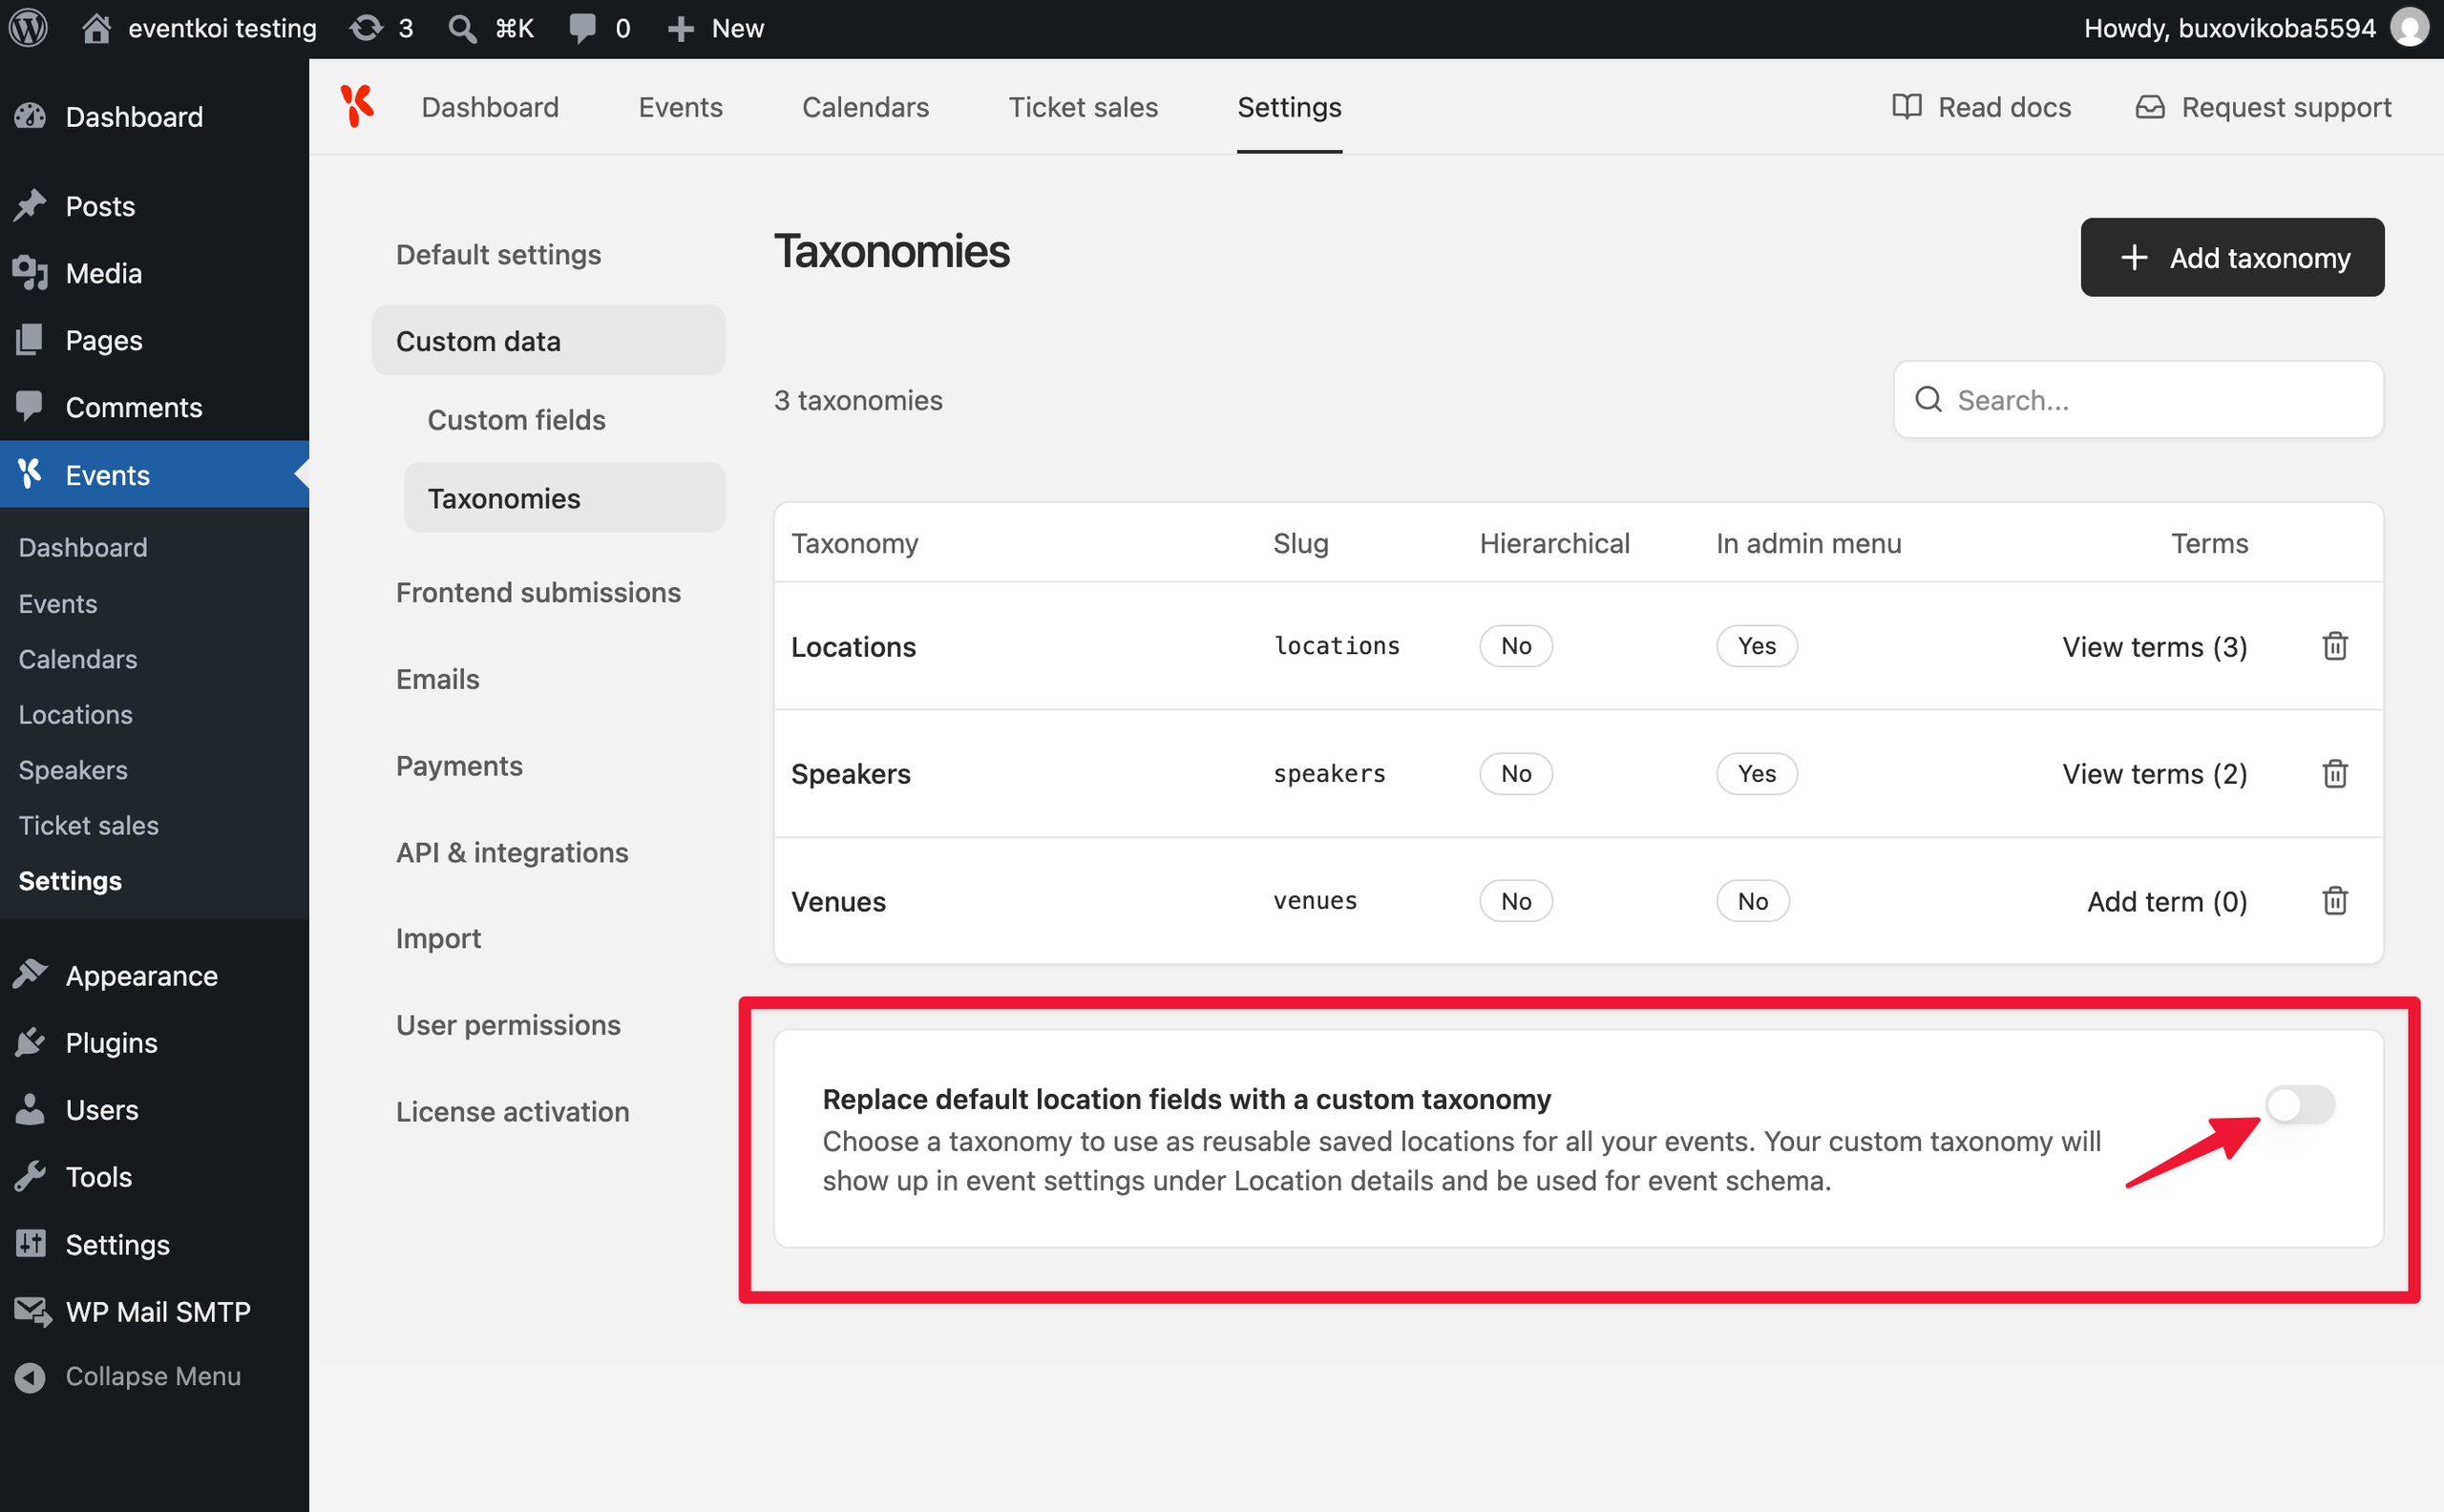
Go to Settings > Taxonomies and toggle on Replace default location fields with a custom taxonomy.
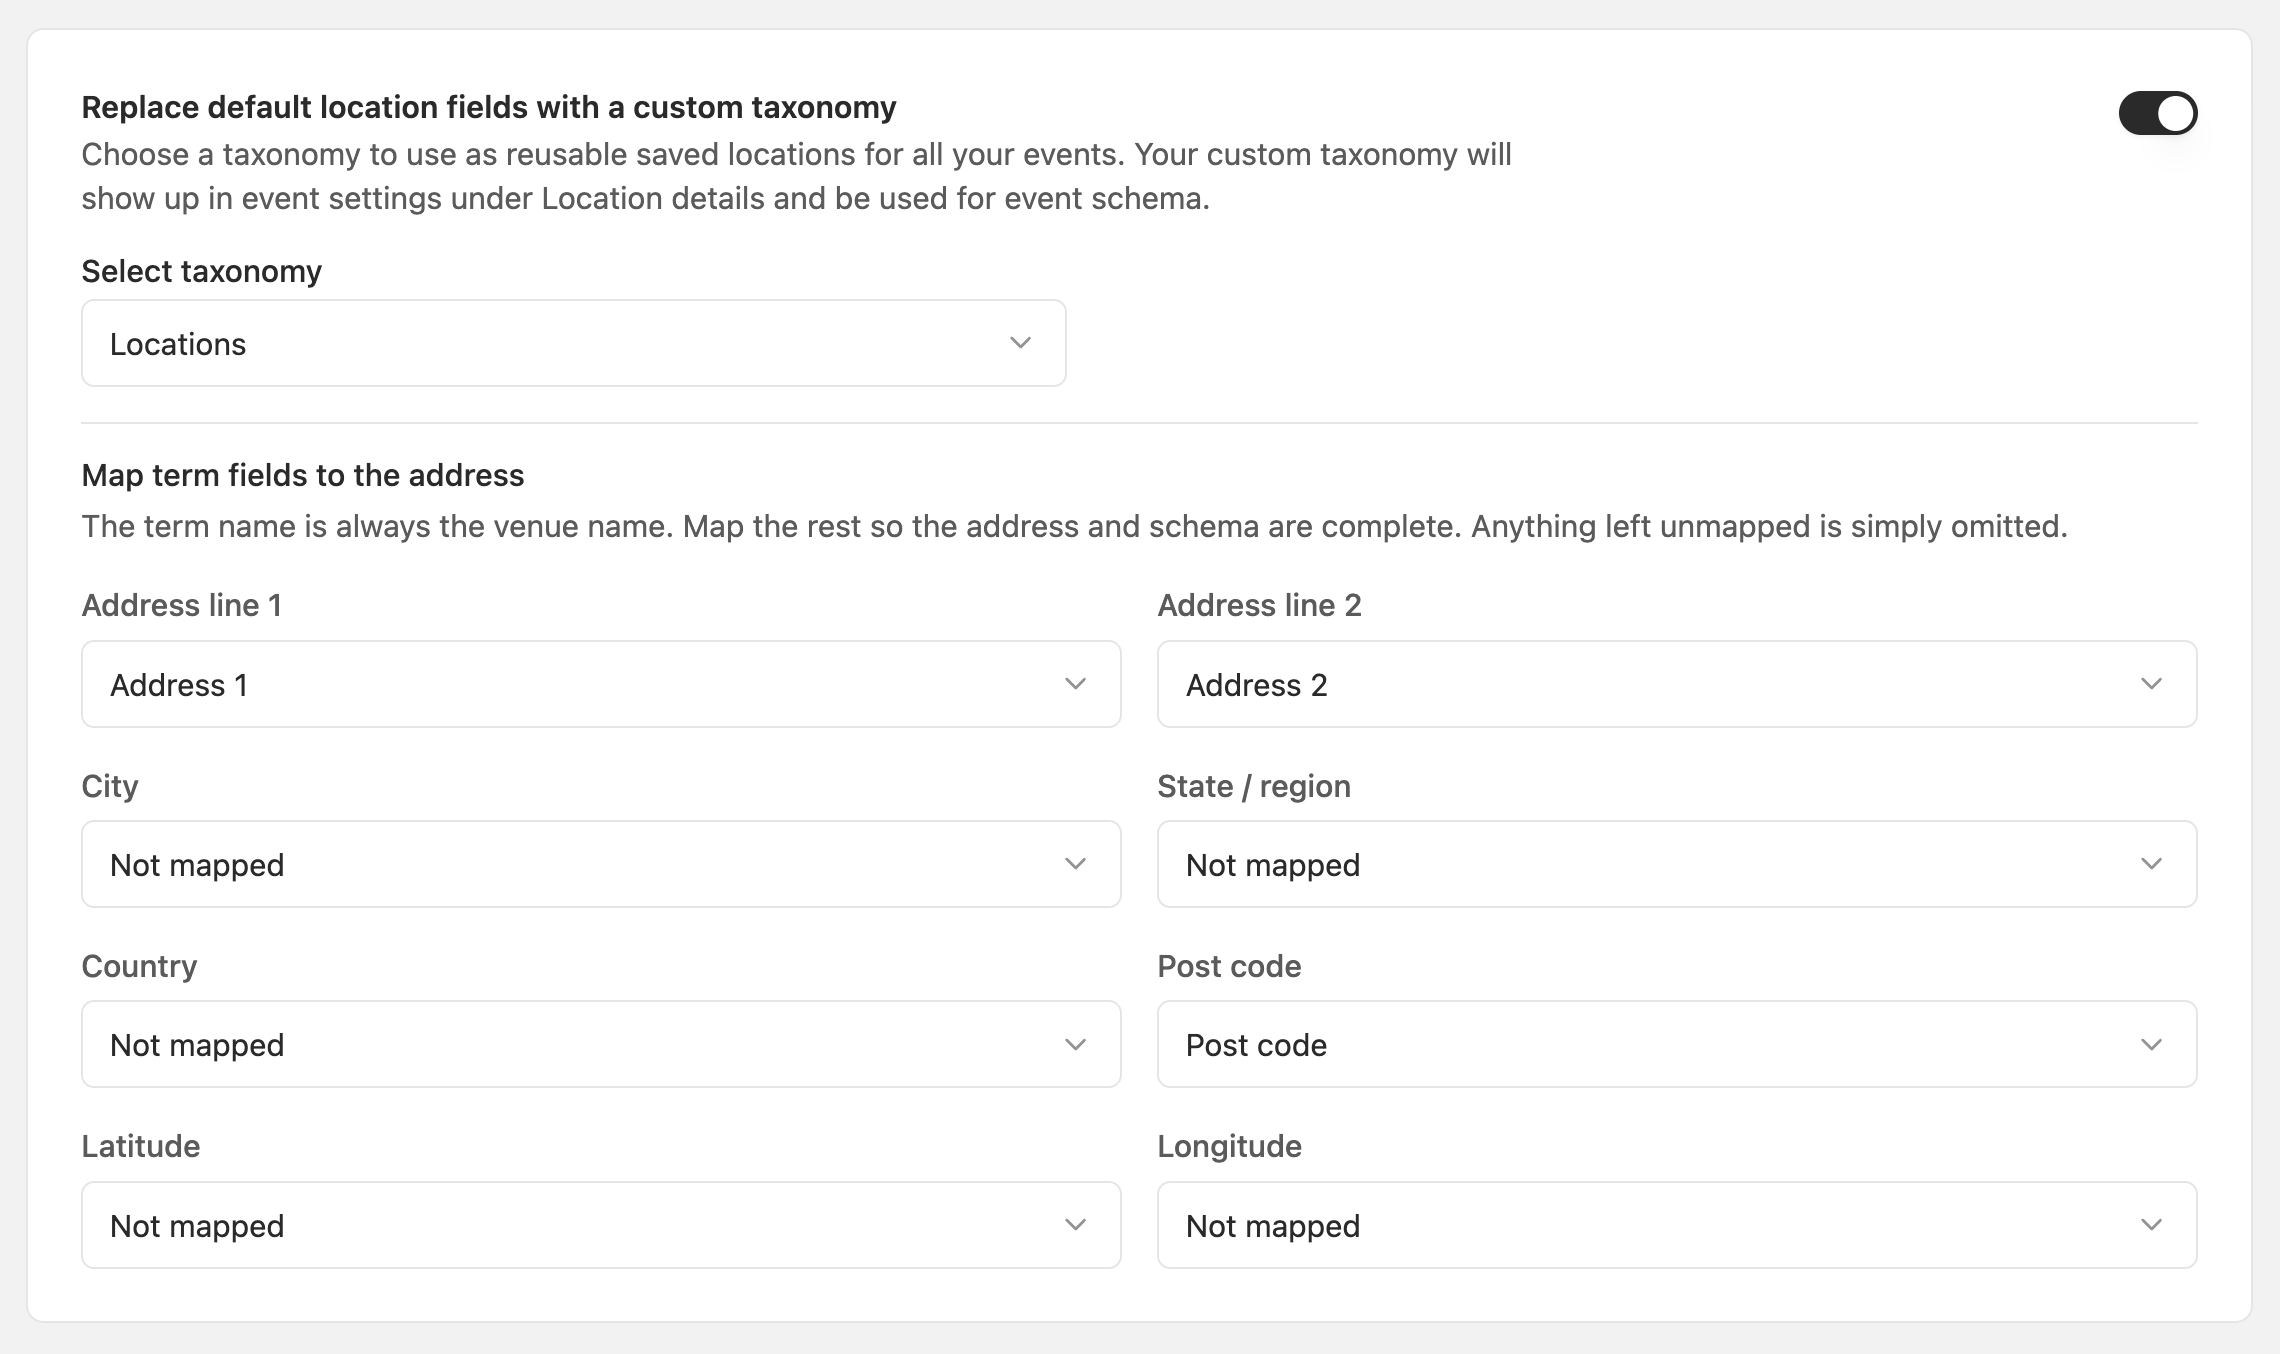
Select which taxonomy to use, then map its fields to the address details. Your mapped fields are used to build the event’s full address, which is what appears on the front end and in the event’s schema markup. Anything you leave unmapped is simply left out of the address.
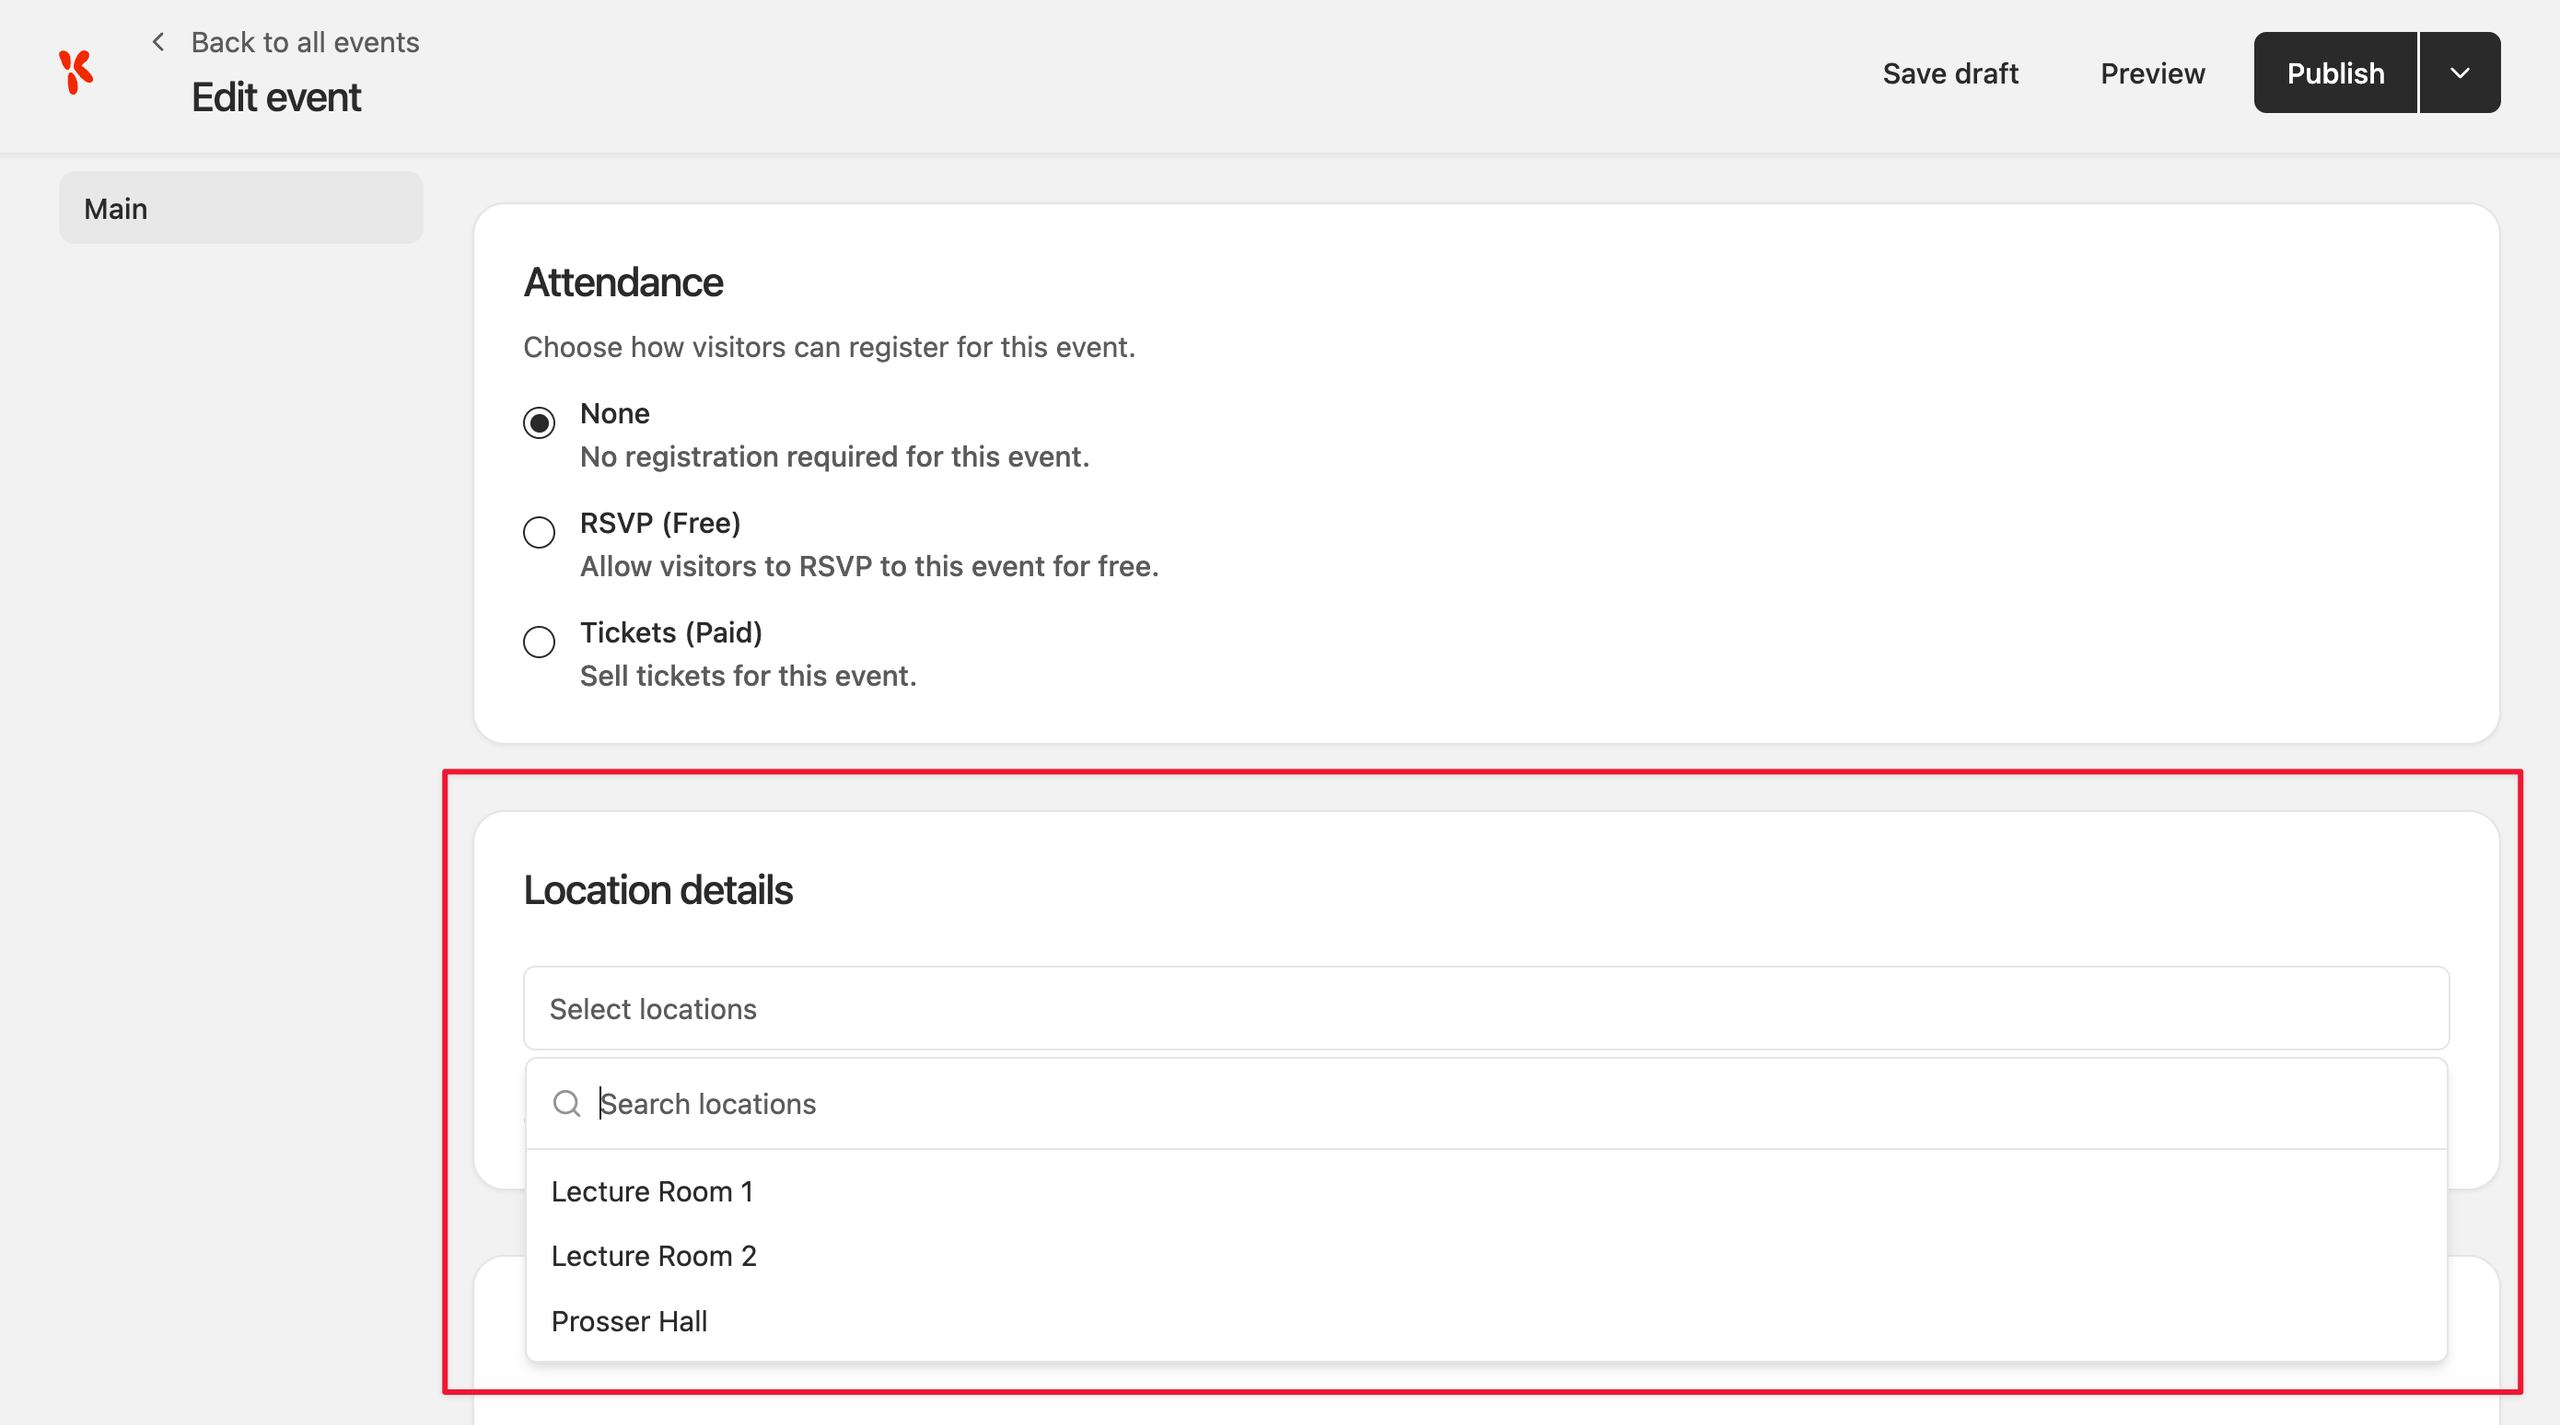
Selecting a location inside event settings
Once set up, the Location details section on the event edit screen no longer asks you to type an address. Instead you’ll see a dropdown listing every term in your chosen taxonomy. Select the one you want.
What happens to events that already have a location
Switching on “Replace default location fields with a custom taxonomy” doesn’t delete your old location details from existing events.
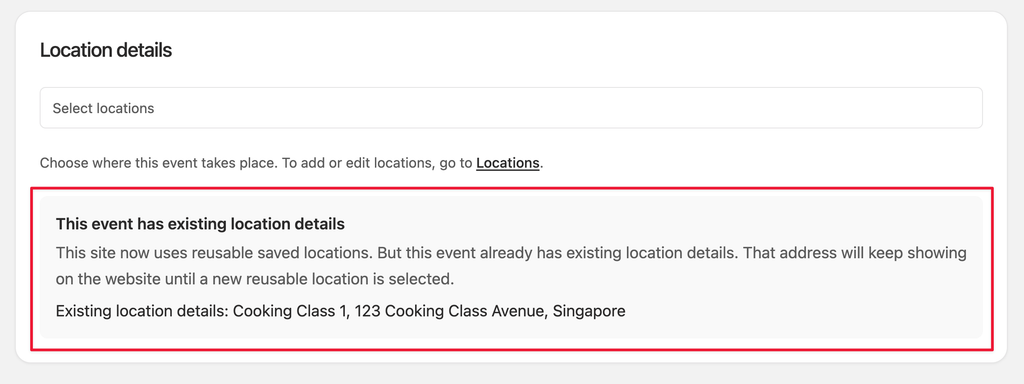
Events created before the switch keep their original location details, and that address carries on showing on your website as normal until you pick a saved location for that event.
When you open an existing event, you’ll see a notice under Location details telling you the event still has its old address, along with what that address is, so you can see what you’re replacing before you choose a saved location.
This means you don’t have to worry about this feature impacting existing events.
Turning it off
Toggle Replace default location fields with a custom taxonomy back off and every event returns to the built-in location fields. Your saved terms become manual text input.