
Embed a responsive, accessible and beautiful calendar on your site in minutes with EventKoi. Below are simple instructions for embedding a calendar using blocks or widgets.
How calendars work in EventKoi
Calendars work similarly to Categories in EventKoi. Each event is assigned to a calendar. By default, your events will be assigned to Default Calendar (which you can change at any time).
This allows you to categorise your events and have separate calendars for different types of events.
For example, if you were a pet shop, you can have a separate dog calendar for dog events and cat calendar for cat events. You can even assign each of those calendars its own colour for events.
And if you wanted to display an overarching pet shop calendar, you can opt to display both the dog calendar and cat calendar in the same calendar at the same time.
Here’s how to create and embed a calendar on your WordPress site.
Step 1: Go to the Calendars Page
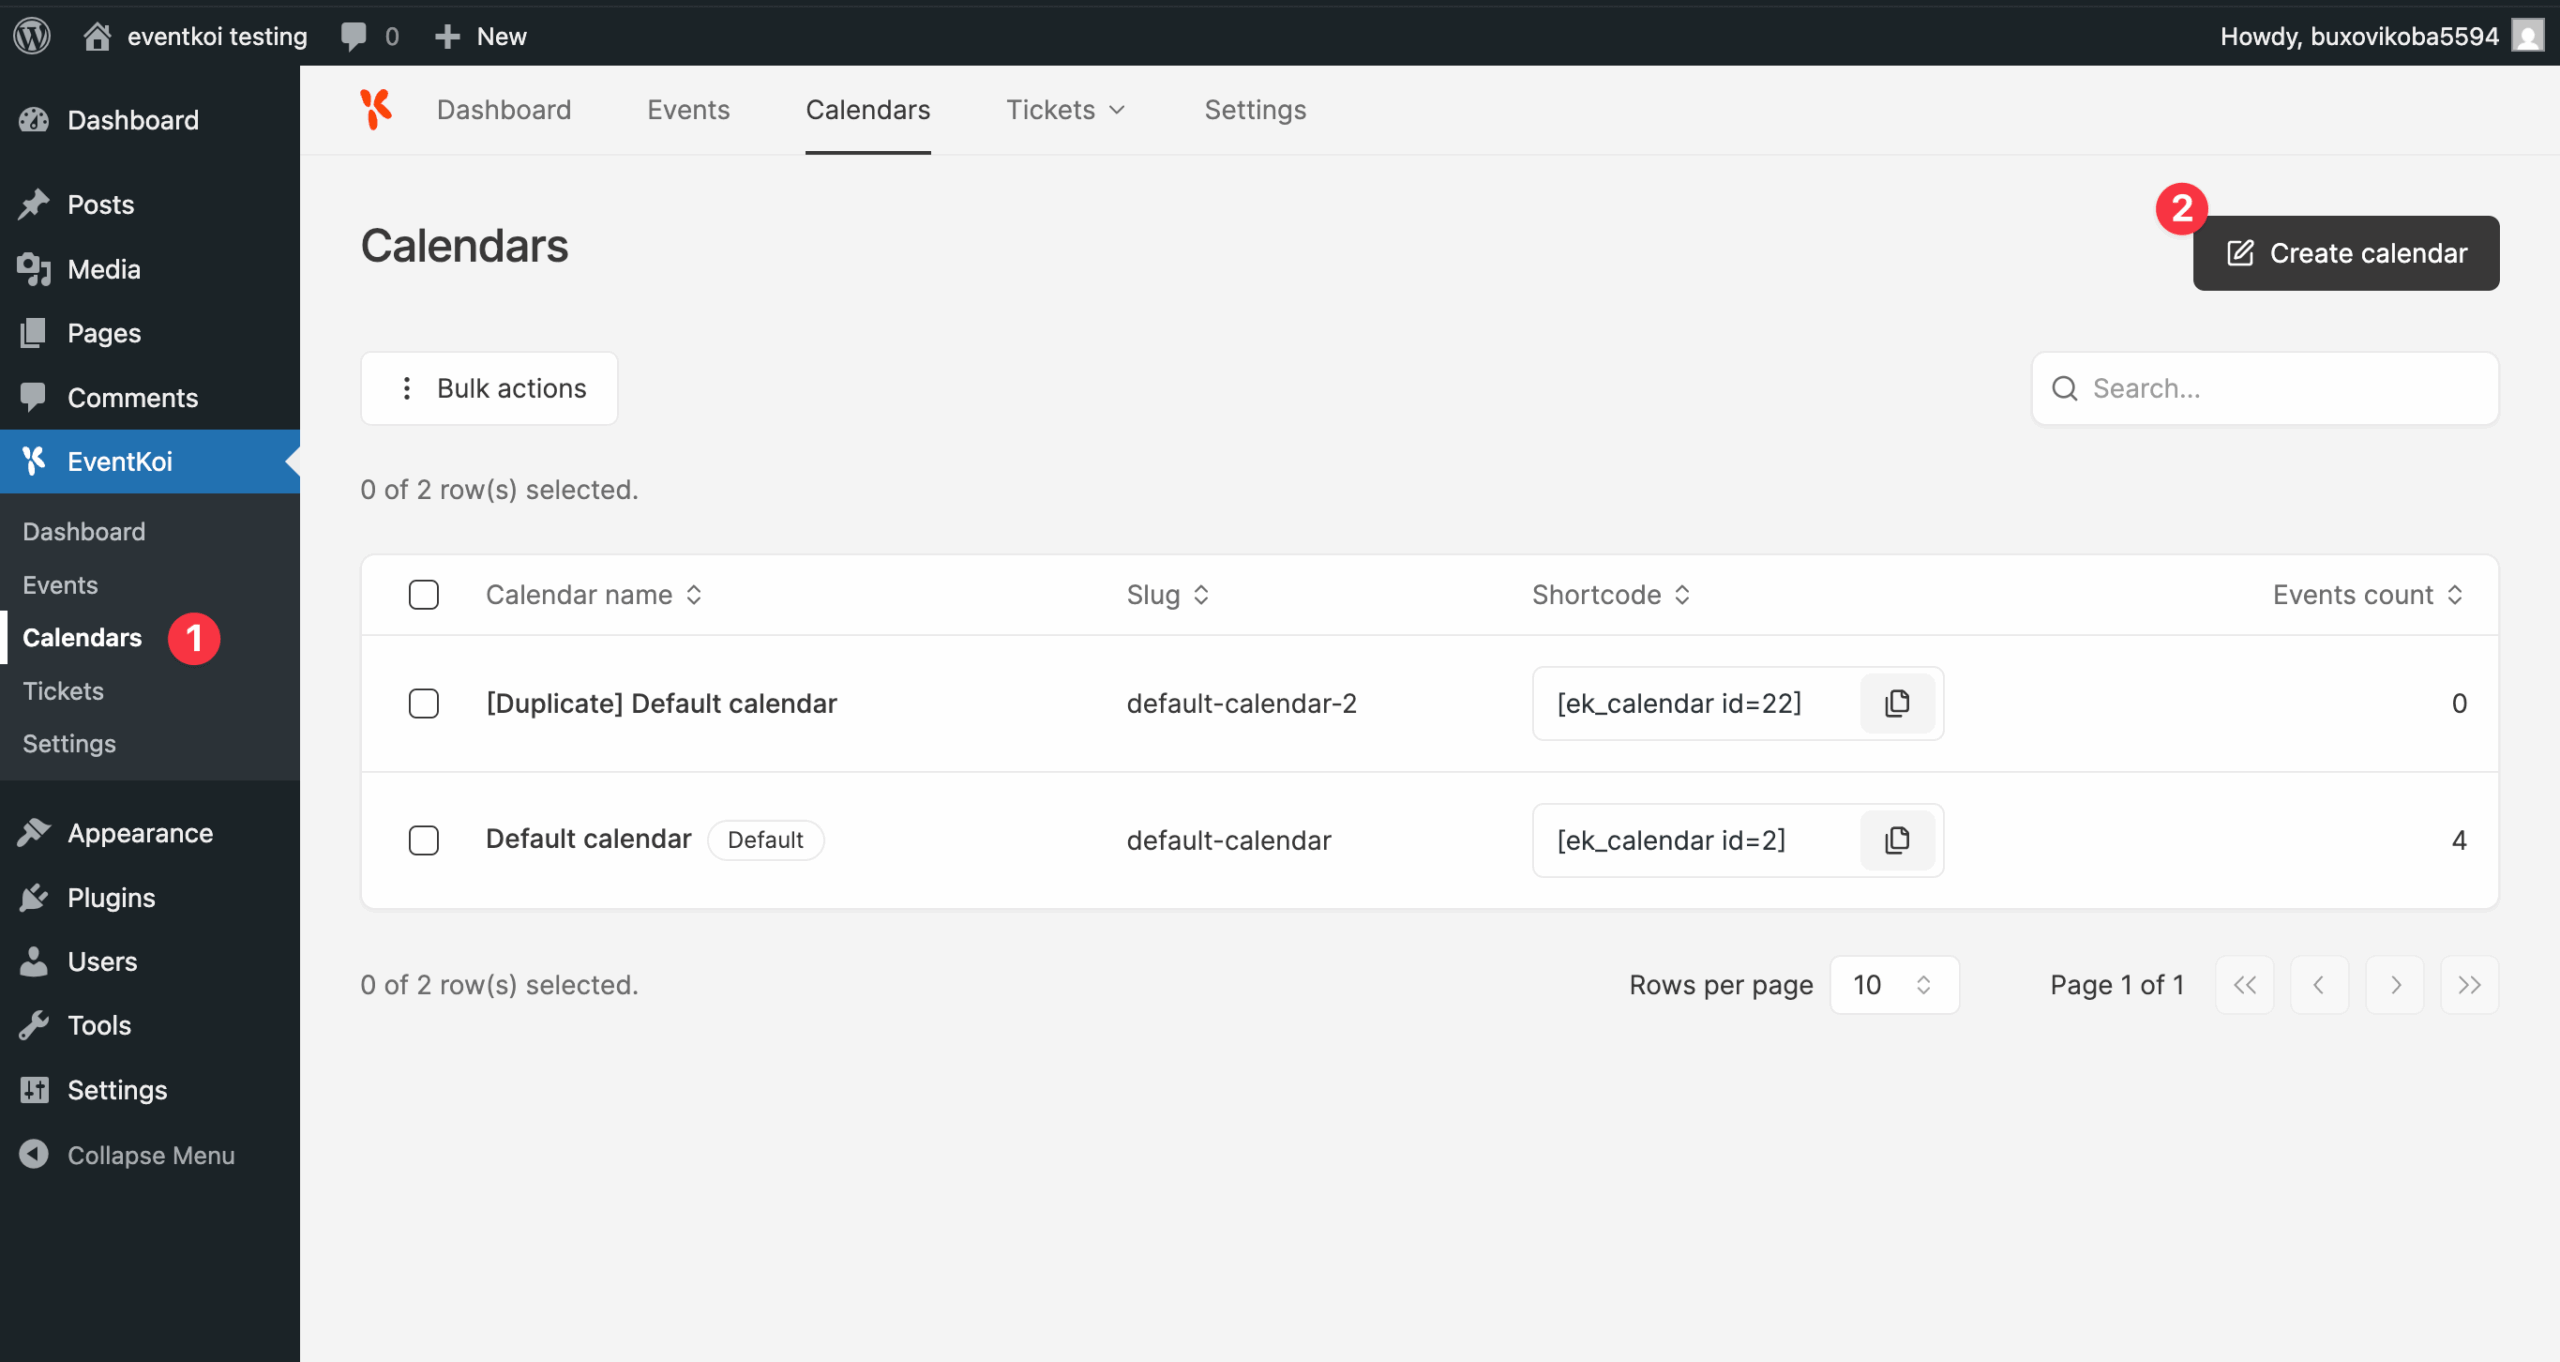
- In your WordPress dashboard, hover on EventKoi and click Calendars from the EventKoi menu.
- Click Create calendar to create a new calendar.
Step 2: Set Up the Calendar
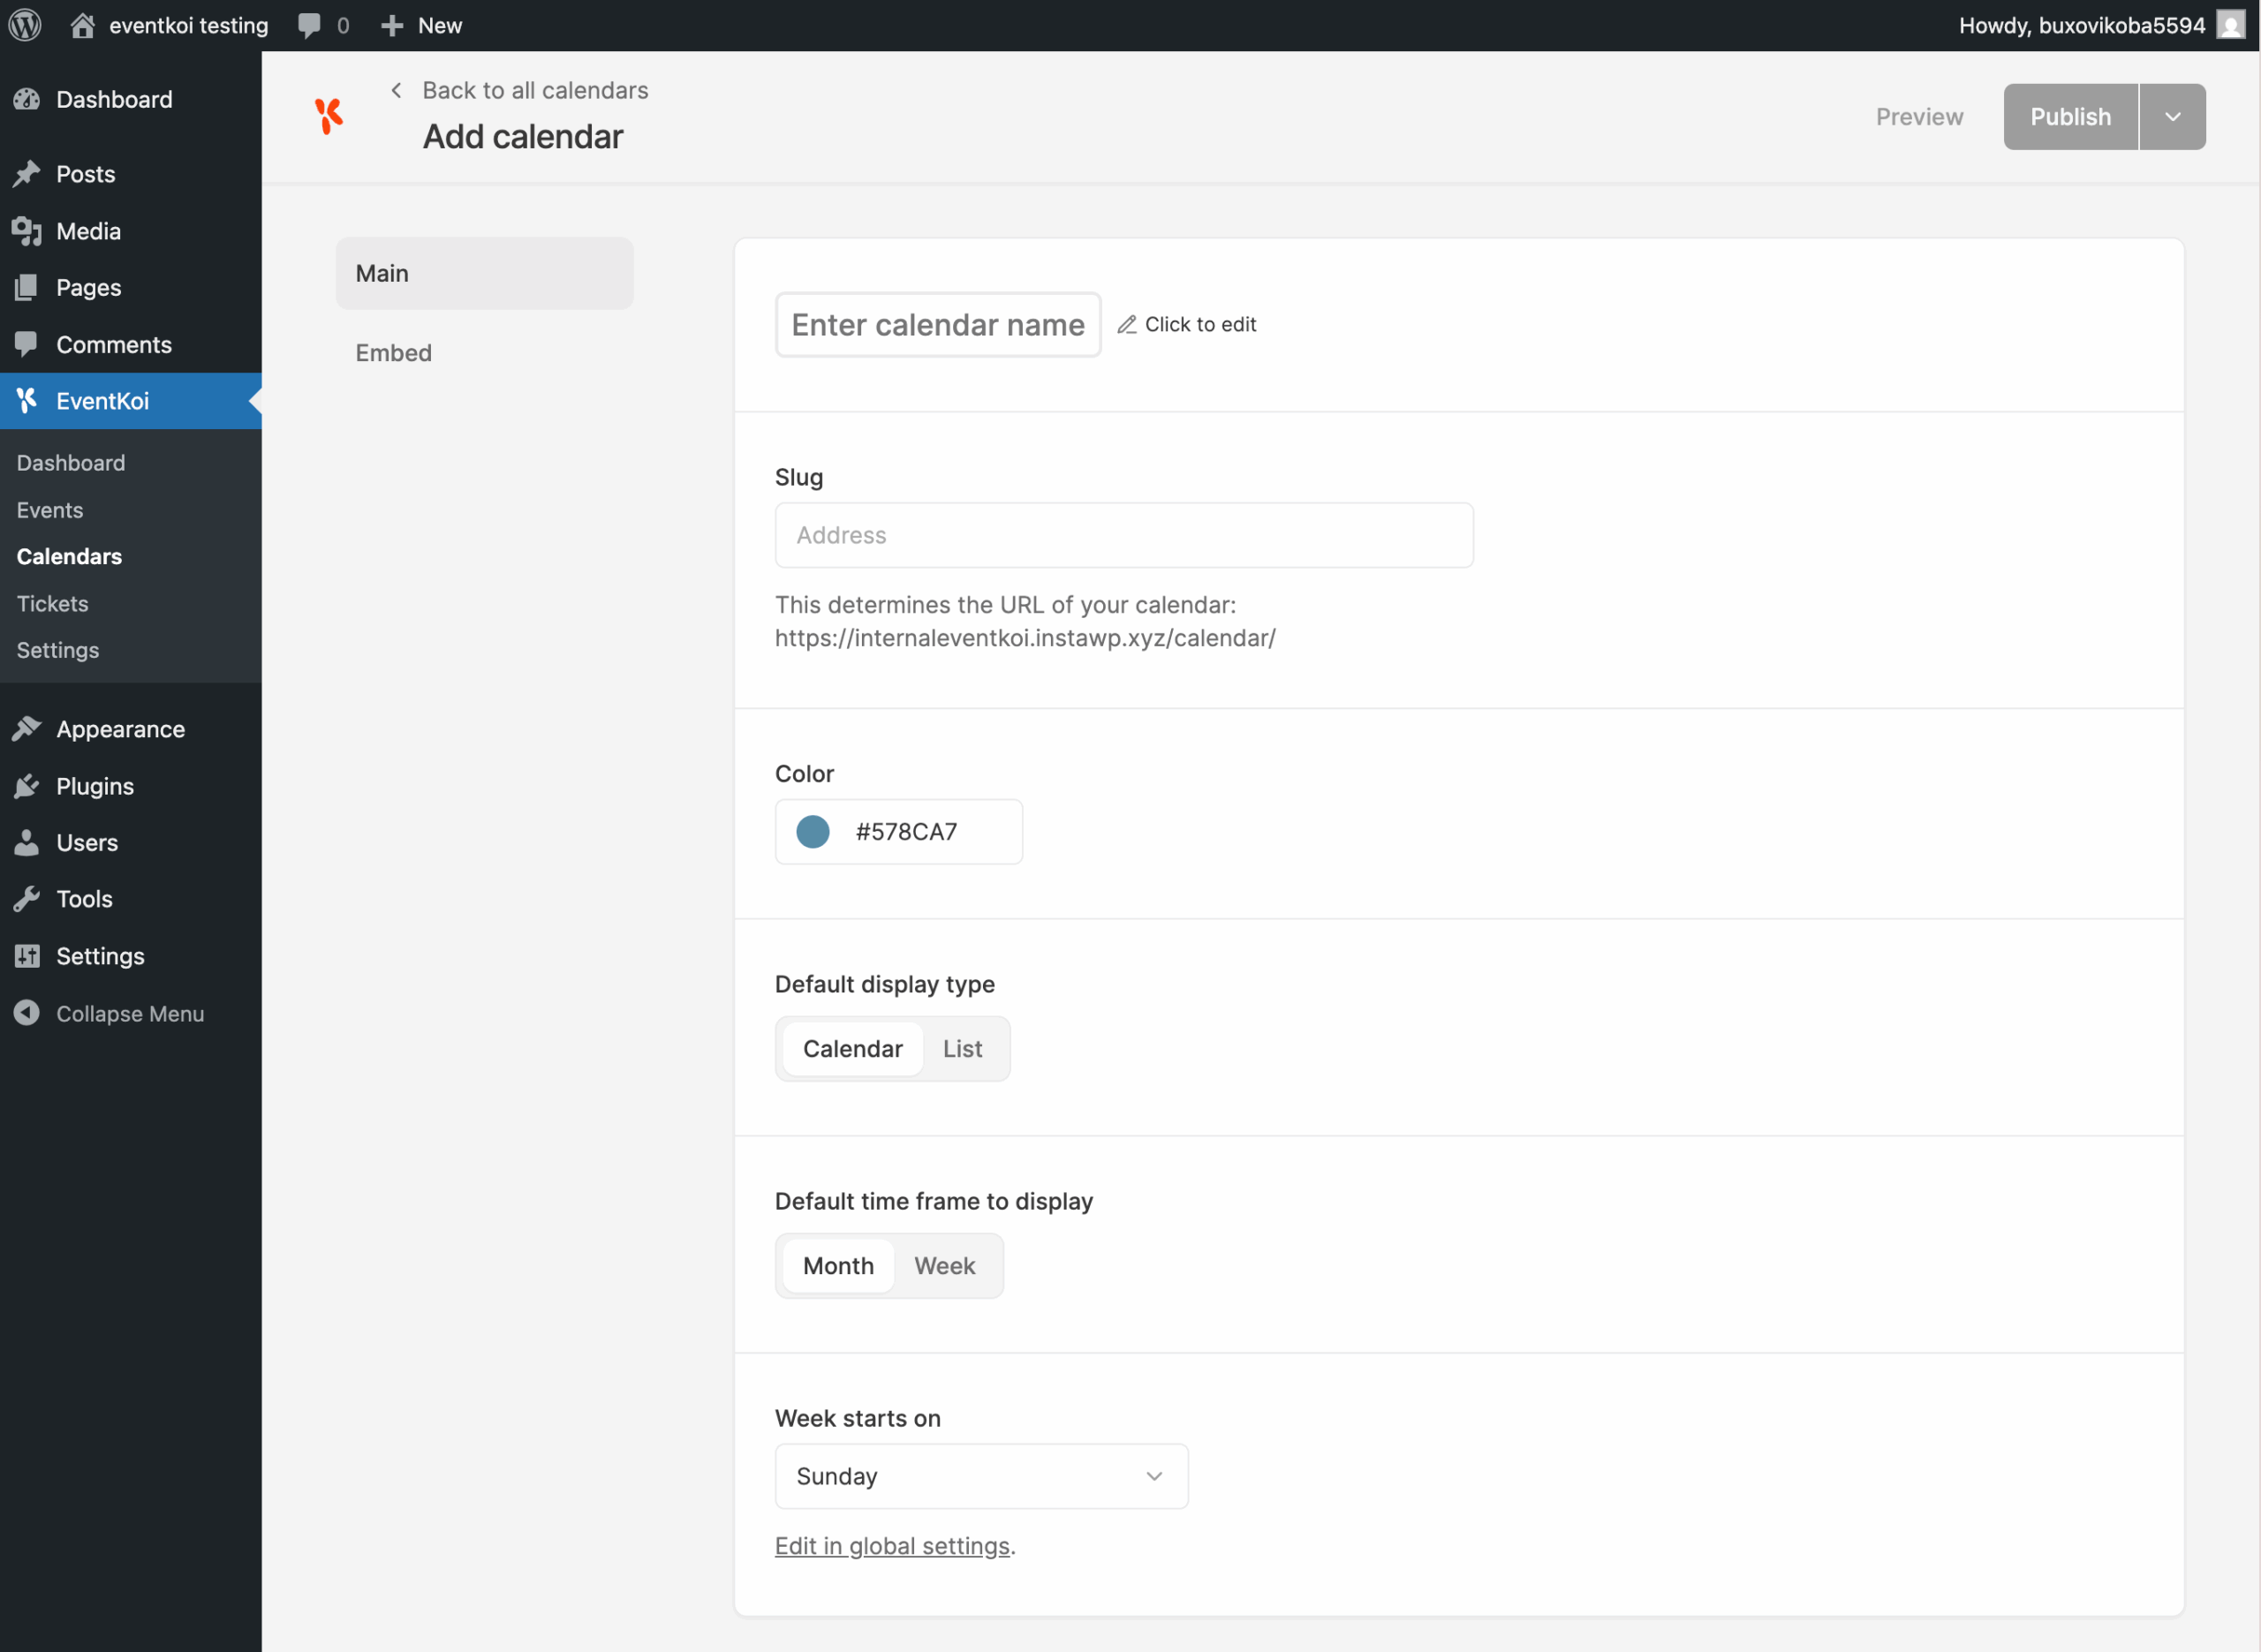
Fill in the calendar details:
- Calendar Name – Site visitors will see this name (e.g., “Workshops”, “Online Events”).
- Slug / Permalink – The URL where the calendar will appear. E.g. yourwebsite.com/workshops
- Color – Select an accent colour for your calendar.
- Display Options – Choose how you’d like the calendar to appear:
- Monthly or weekly
- List of upcoming events
- Week starts on – Choose what day will appear as the start of the week on this calendar. You can also change the defaults at a global level.
Step 2: Preview and publish
Preview the calendar. You might not see any events listed, as a brand new calendar will not have any events attached to it.
Click Publish to save the calendar.
Step 3: Add events to your calendar
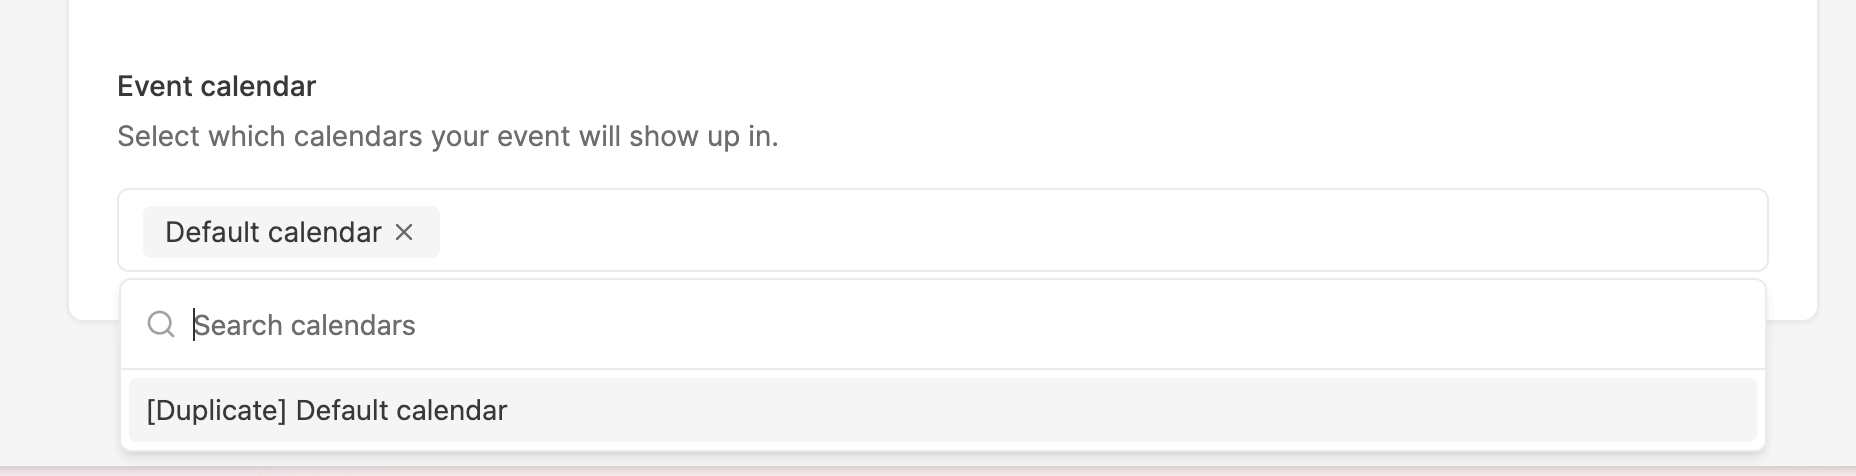
To view events in your calendar, you will first have to add them.
Head to events and create a new event. Or edit an existing one. At the bottom of the events settings, you’ll see an option to select an event calendar.
After saving, you will now be able to see your event in your calendar.
Step 4: Embed the Calendar on a Page or Post
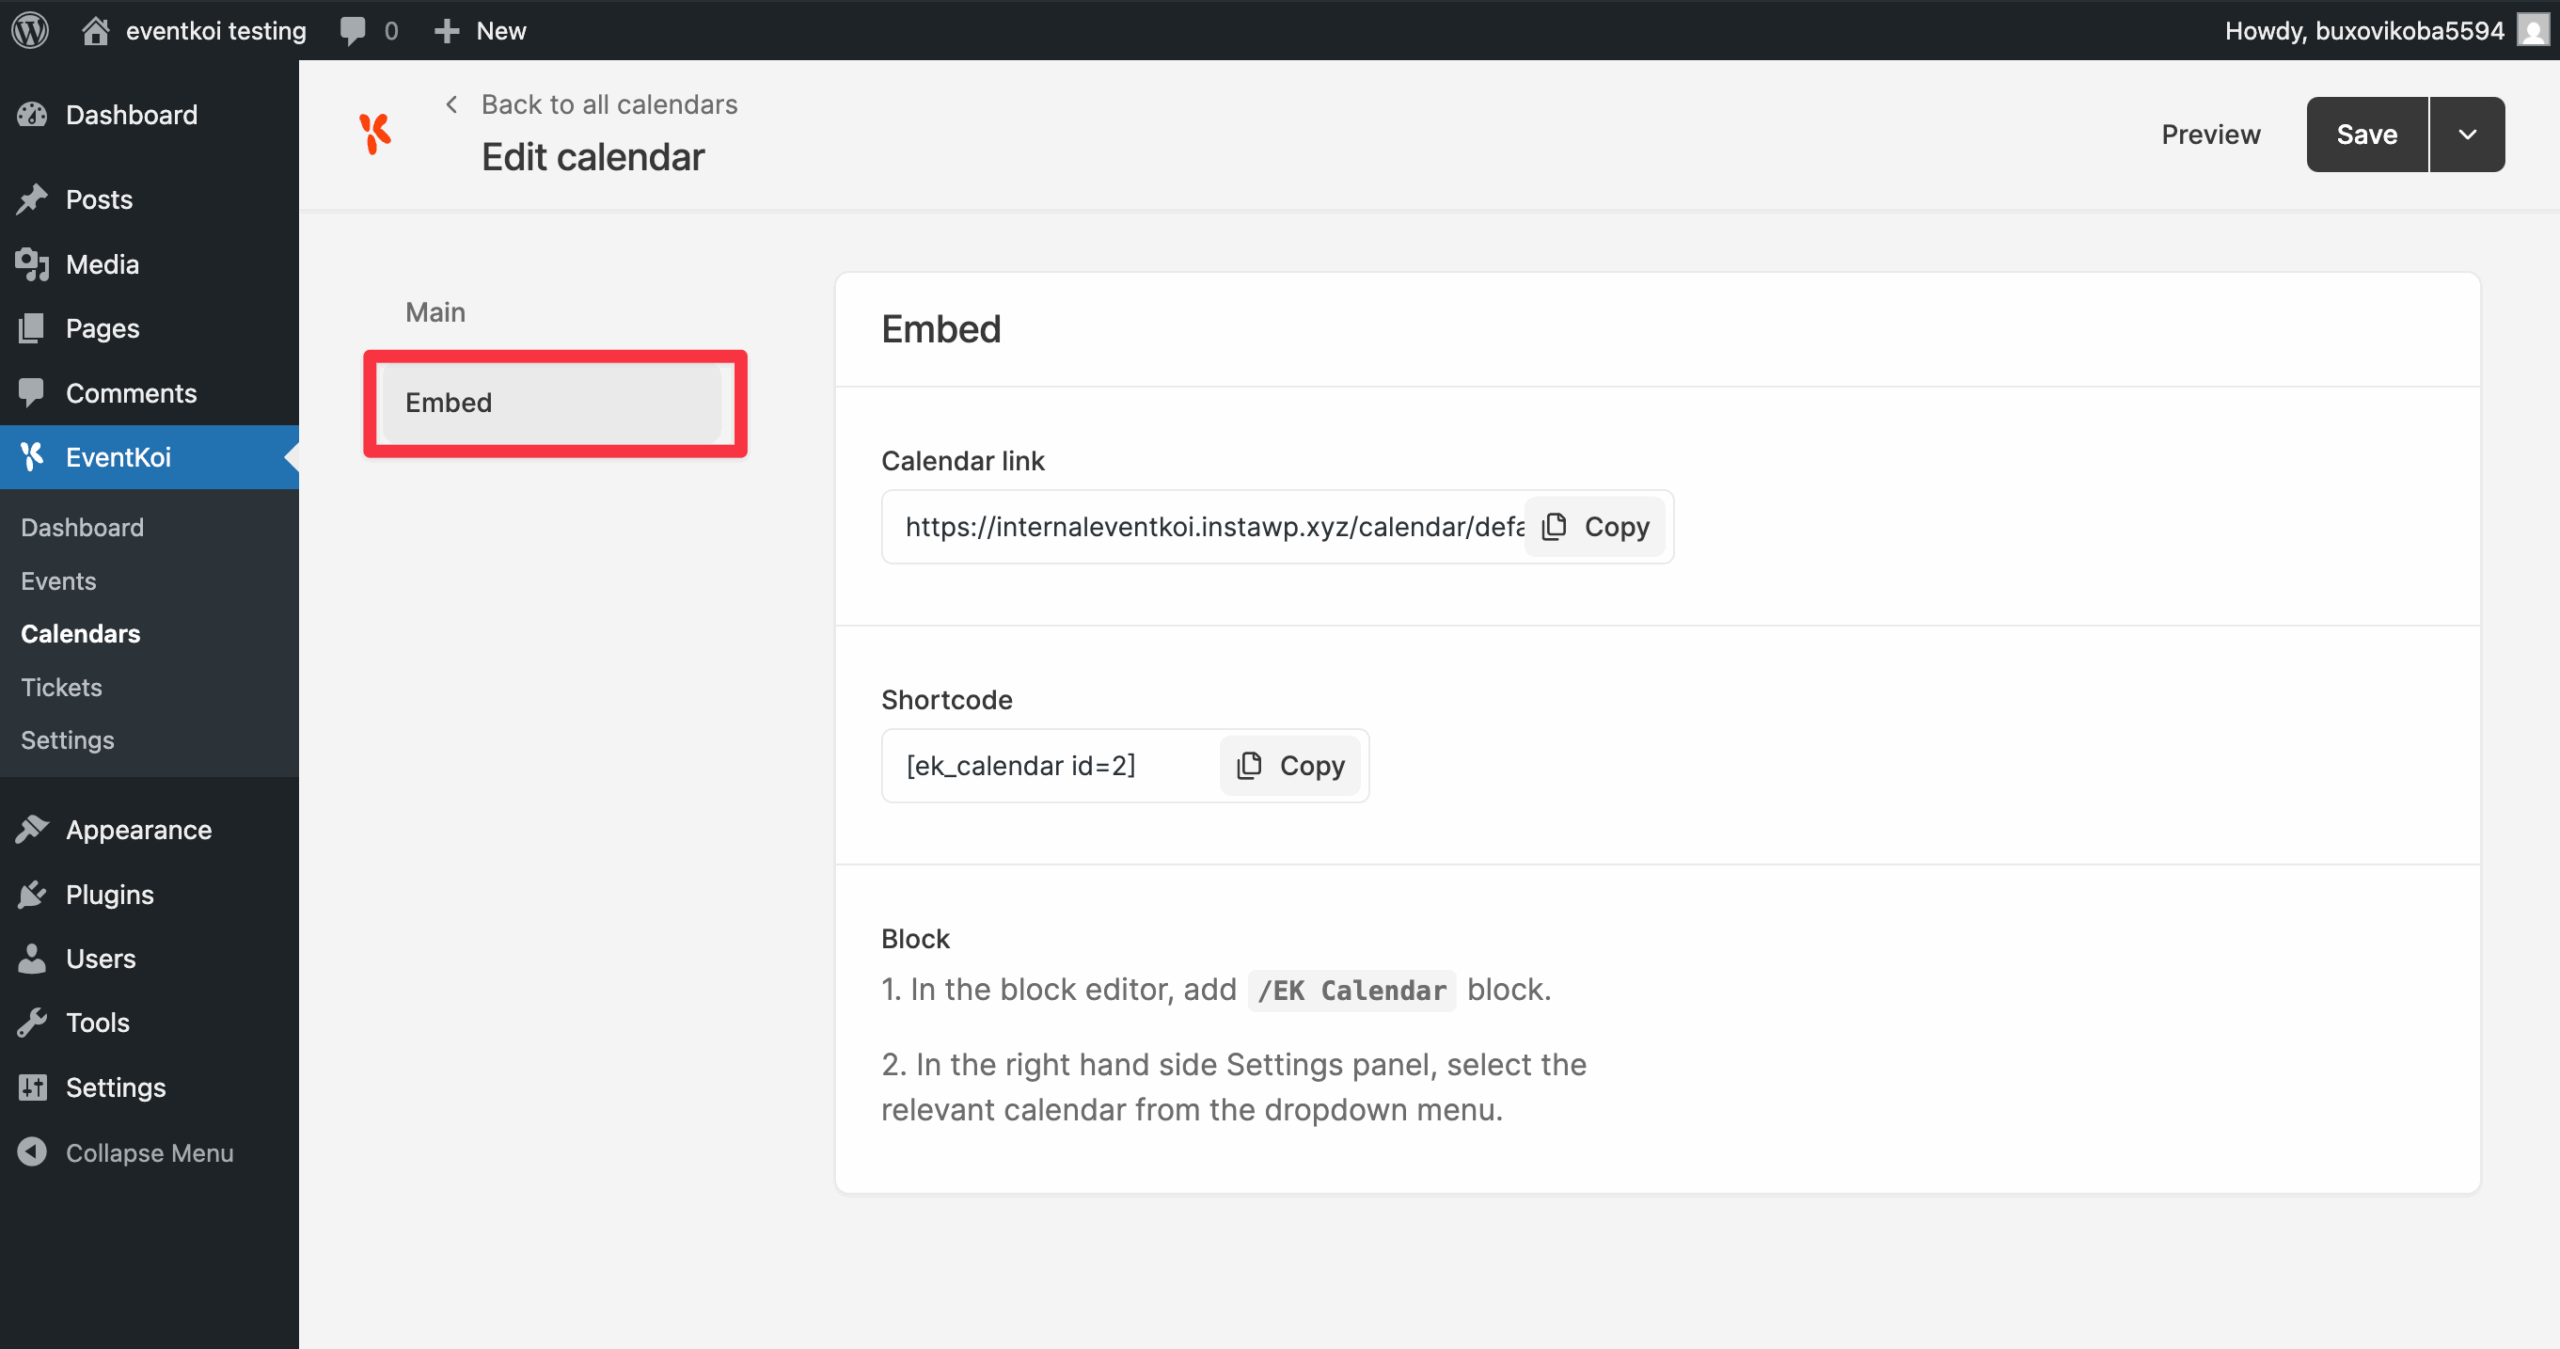
Once your calendar is published, click on Embed to see how you can embed your calendar on your site.
1. Calendar link
Your calendar will immediately appear on the link shown.
2. Shortcode
Use the [ek_calendar] shortcode.
The shortcode will display the id of the relevant calendar. E.g. [ek_calendar id=1]
You can paste this shortcode into:
- Pages
- Posts
- Widgets
- Elementor or Block Editor shortcode blocks
Method 3: Calendar block

- Create or edit a page or post.
- Click the + icon to add a block.
- Search for “EventKoi” or “EK”.
- Add the events calendar or events list into your post.
- Use the right hand panel to style your block accordingly.
Done
Your calendar is now live on your site and will automatically show events assigned to it. You can update its style and settings anytime from the Calendars menu.
Here’s how the calendar looks like on the frontend:
