
This guide shows you how to create a custom EventKoi event template using Beaver Builder. You’ll learn how to build the template, link it to EventKoi events, and apply it on the frontend.
Begin by creating a new Themer Layout.
Go to Beaver Builder > Themer Layouts, then click on the Add New Themer Layout button.

For the options, you’ll want to:
- Give your themer layout a clear name that will help you locate this template in the future.
- For Content, select Themer Layout
- For Layout, select Singular
Then click Add Themer Layout

You’ll then create more options for your themer layout.
- Select the Location (which is where this template will be used). In this case, select Event.
- Assuming you want to use this template for all events, you can leave it as All Events. Or you can select a specific event. There are even exclusion rules which give you finer control over which events to use this template for.
- For custom template, also select Events.
When you’re ready, save draft and launch Beaver Builder.

From here, you can build your template however you want, using our calendar and event modules as well as our dynamic tags/field connections.
When you’re done, publish your themer layout.

Connect your Themer Layout to EventKoi
Once you’ve built your themer layout, you need to assign it to events in EventKoi.
Global event template
If you would like to use your new template for all future events in EventKoi, you will need to set it at a Global level.
Access it by heading to Events > Settings. In the Default settings tab, scroll all the way down till you see Default event template.

Click on the dropdown and scroll till you see the Beaver Builder section. Look for the template you want to add under that section.

Once added, all new events you create will default to using the Beaver Builder template you’ve selected.
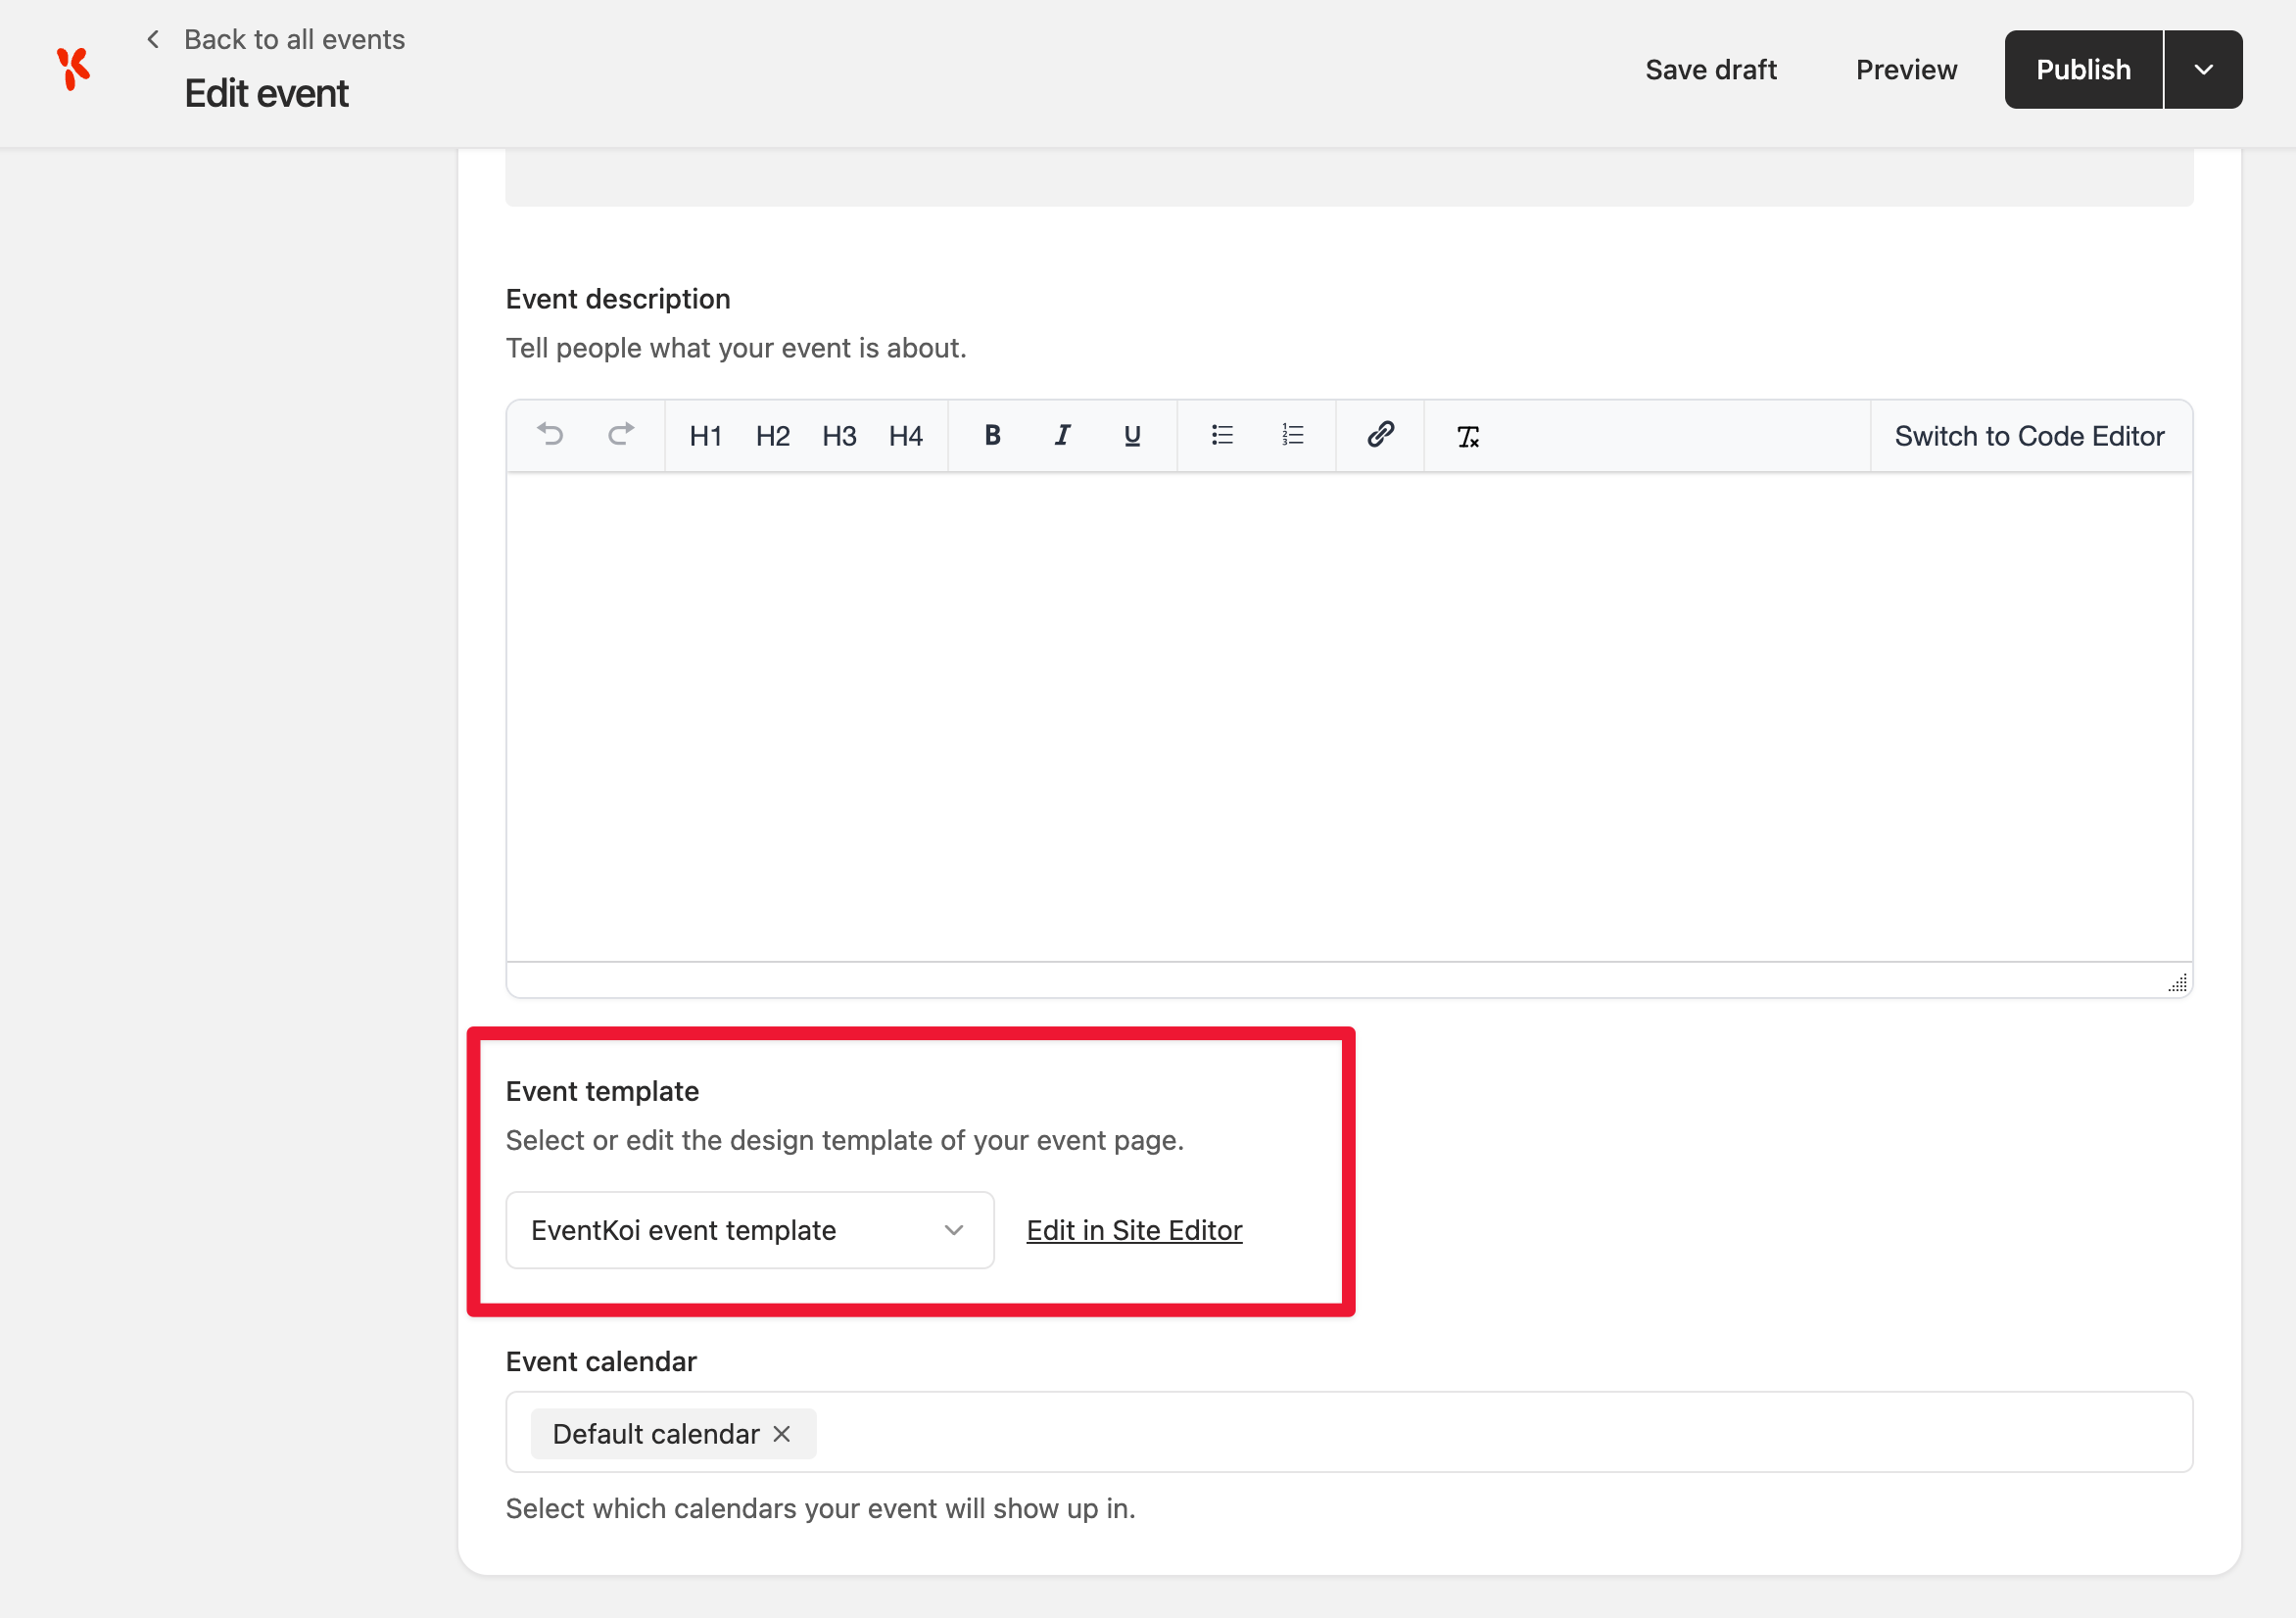
Event-level event template
You can also select your template at an event-level.
Head to an existing event or create a new one.

In the Event Settings, scroll all the way down till you see Event template. From here, click on the dropdown, look for the Beaver Builder section, and select the relevant template you want to use.
When you’re done, save or publish your event.
That’s it. You have successfully linked the themer layout you created in Beaver Builder to EventKoi. So this event will display on the frontend using the Beaver Builder design you have created and assigned.
Get more from your EventKoi + Beaver Builder integration
There are multiple ways of integrating EventKoi with Beaver Builder. From custom-built elements to advanced dynamic event data, you can control how events appear across your site using Beaver Builder
To learn about all the available approaches and ensure you choose to right path, read our EventKoi + Beaver Builder integration overview: