
What is the Event Data block
The Event Data block lets you add different types of event data into your posts, pages and templates.
Currently, you can add Title, Description, Date and Time, Location, and Image via the Event Data block. More data types will be added over time.
Using the Event Data block in a post
Adding the Event Data block into a post
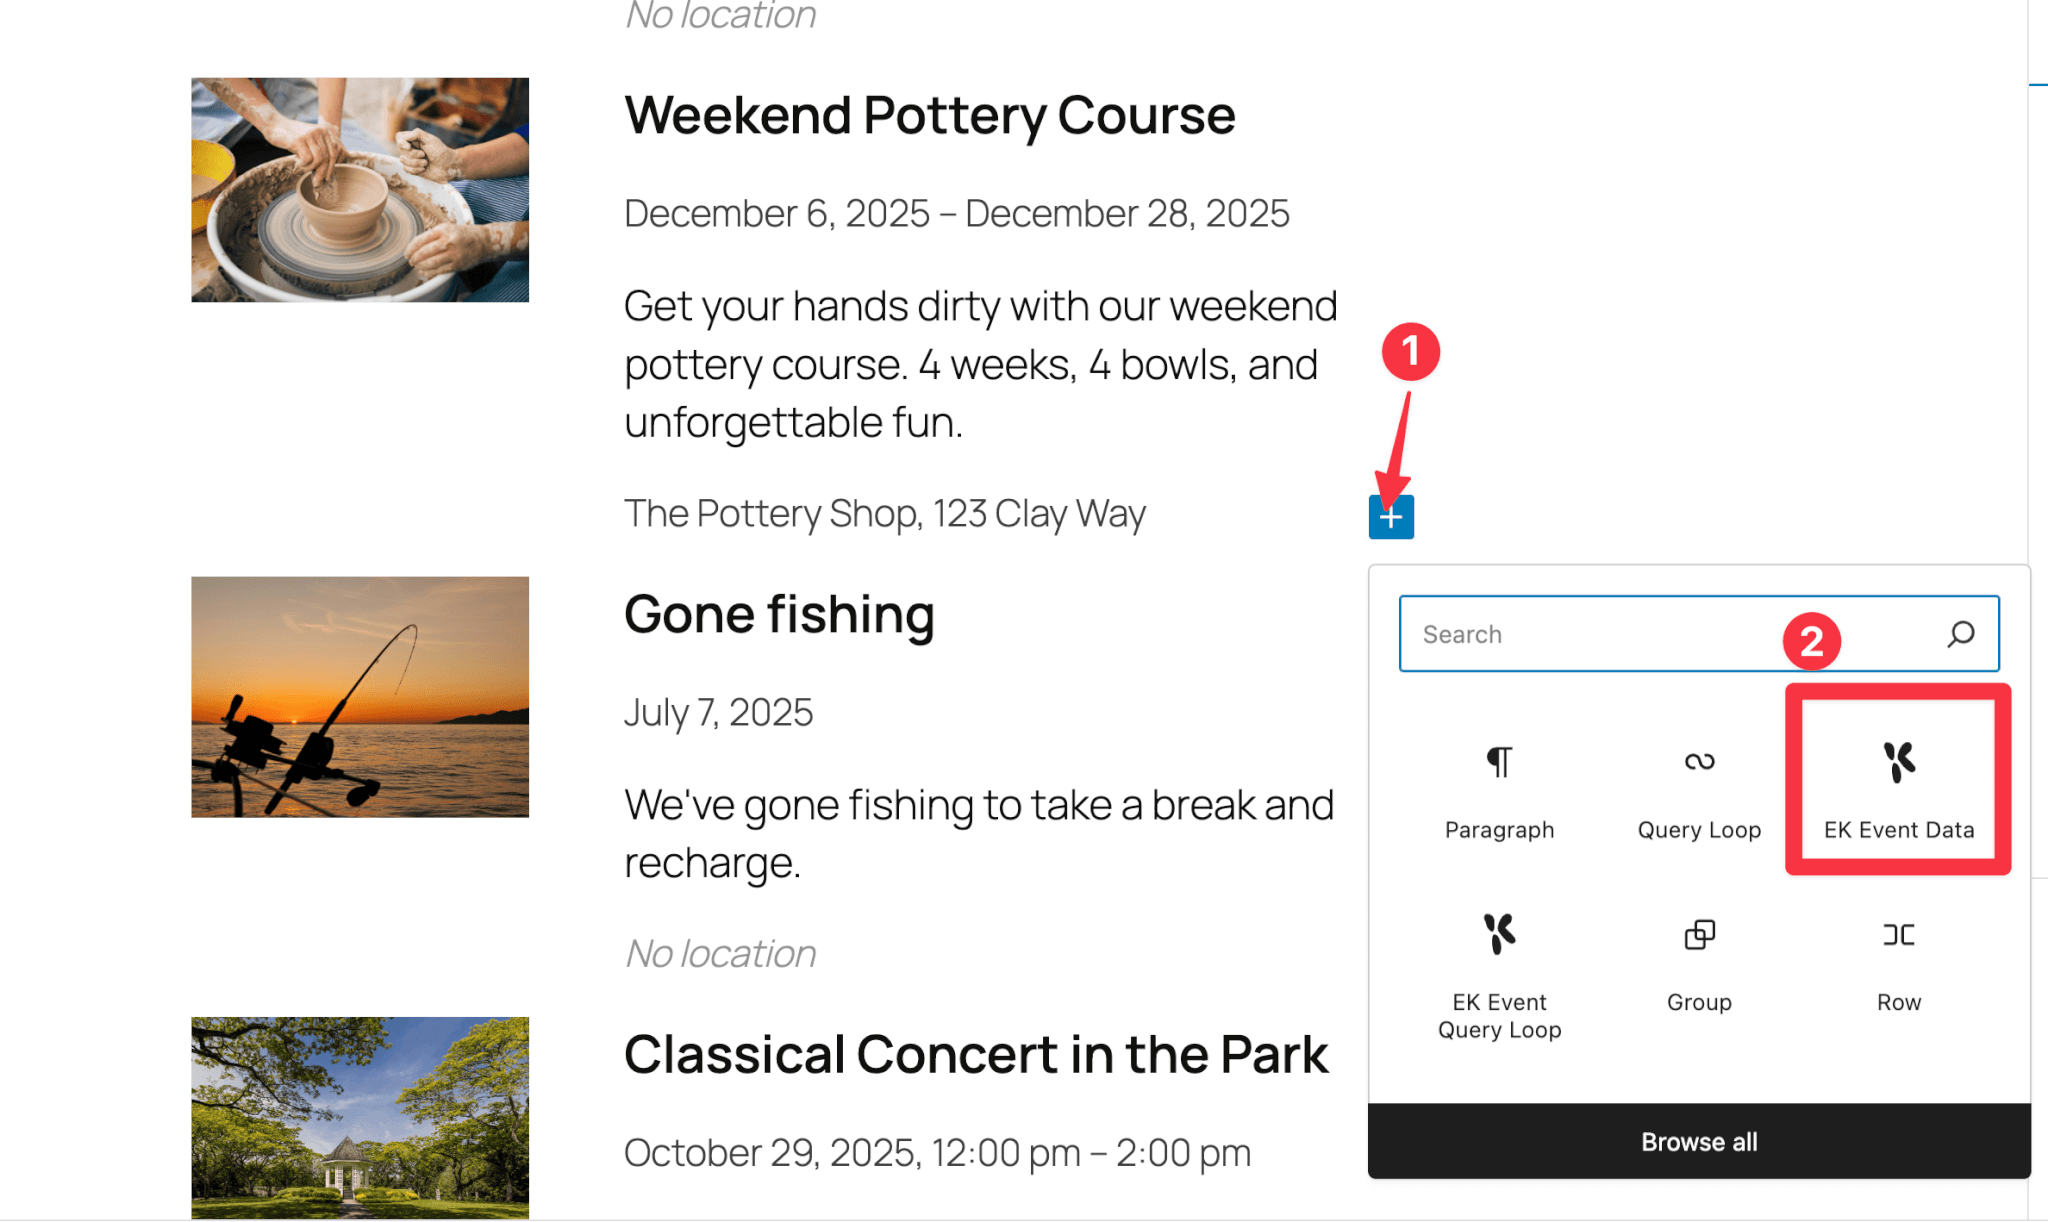
To add the Event Data block into a post, click on the block inserter to add a new block.
You can either click on the light blue square plus button on the top menu OR the black square plus button inside the block editor itself.

Then type in “EK” in the search bar, and select EK Event Data block.

Event Data block settings
When you first add the Event Data block into a post, you’ll see 2 settings: Event Data Field and Event Source. You’ll also see some text in the editor that starts with, “No event available…” This is because no data is on display since you haven’t selected any data from the settings.

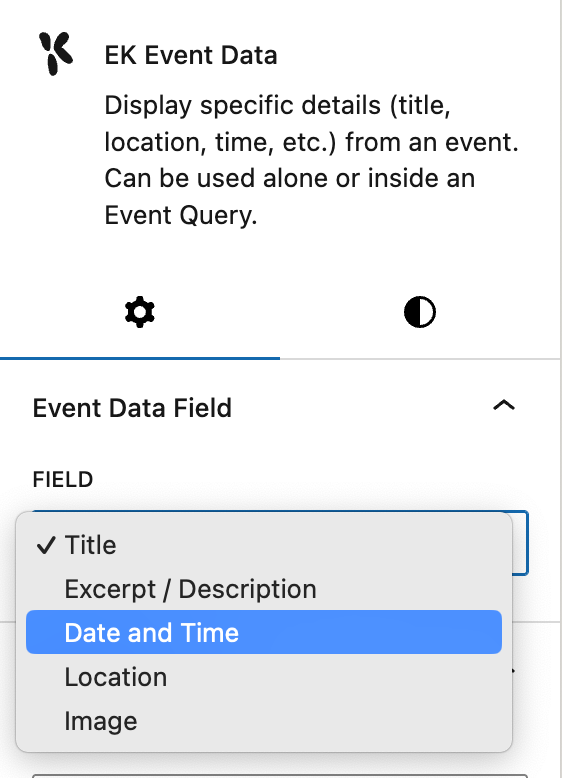
Select Event Data Field
Start by selecting what kind of data you want: Title, Description, Date and Time, Location or Image
Select Event Source
Then, select which Event you want the data to be pulled from.
Once you’ve selected both an Event Data Field and an Event Source, you’ll notice that the text in the block editor has changed from “No event available…” to the correct data.

Styling Event Data with the Design tab
Next, select the Design tab. This will allow you to design and style your data.
In the image below, you can see that I’ve made the following design changes:
- Changed text colour to Purple
- Changed background colour to Yellow
- Changed font to Manrope
- Changed font size to XL (this is set by the theme)
- Increased padding on all sides

A note about Event data: Image
When you choose Image in the Event Data Field, the Design tab will still show text-based design options.

Using the Event Data block in a template
Using the Event Data block in a template is the same as using it in a regular post, with one exception – in a template, you do not need to select the specific Event Source. Instead, the Event Data block will automatically assign the correct data.
You will need to know how to use our event templates in order to use the Event Data block in a template. To learn this and more, please read:
We will assume you know how to access, edit, save, and use block templates, and limit the scope of this doc to the Event Data block specifically.
After inserting the Event Data block in your template, you will need to select the Event Data Field.
Then, you want to keep Event Source blank – this will allow the template to pull the correct data based on the event that is using the template.

You can still customise the design of the Event Data block. The design will be reflected in the “No event available…” message.

And that’s it. The Event Data block should work correctly in your template.
It’s worth noting that in many scenarios, using meta keys as mentioned in the doc, How to customise the default events template, is a better approach. It has the same styling options as the Event Data block but there are more meta keys (meaning more data options to choose from) and you can can add meta keys in line with other text.
Using the Event Data block as a nested block inside the Event Query Loop block
The Event Data block was originally built to be used inside the Event Query Loop block.
Everything you need to know about using the Event Data block inside the Event Query Loop block can be found here:
However, you can get a brief overview here if you do not need the details:
When you create an Event Query Loop, it comes with a handful of Event Data blocks already nested inside.


Because all the information is displayed using Event Data blocks, this means you can switch up the location of data simply by switching the Event Data Field.
If you want to add an additional piece of information, you can click the blue plus icon inside the editor and add an additional Event Data block.
Other ways to insert event data into posts and templates (shortcodes and meta keys)
The Event Data block is just one of three ways you can insert event data into posts, templates, and more.
The other two ways are via meta keys and shortcodes. Each method has its advantages and disadvantages. At EventKoi, we have provided you with multiple options so that you can choose the one that suits you best.
Learn more about meta keys and shortcodes here: